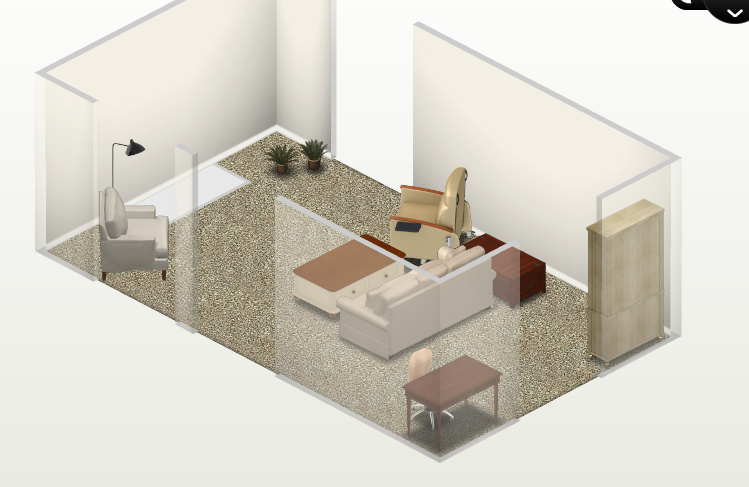
 Welcome to #GEEKOUT Tuesday where I share what I'm totally geeking out over at the moment. Today, it's our new bedroom! Kid's come first: always. So, when my pre-teen started to express his need of wanting a new "kid-free" zone away from his little brother and sister-at first, reluctant- eventually I concurred. While, my giant-growing-too-fast-for-this-momma loves his baby brother and sister, he still craved a space of his own where he could live out all of his Youtube gamer stardom dreams and have his own personality expressed in a space of his own. With a three bed room house and three kids, that leave momma and daddy with out a space of their own. Sorry, little man. No room for you. Then, one night we decided to have a family camp out in our living room. We drug all of our mattresses, pillows, and blankets out into our living room. We spent the night watching movies, eating popcorn, running amuck and having a crazy fun time. It was during this madness that I realized how much room our living room actually had. Our queen sized mattress fit perfectly while still leaving ample amount of room for everything else. Tada! Solution: solved. I created a layout so you are able to see our living room as it was BEFORE:
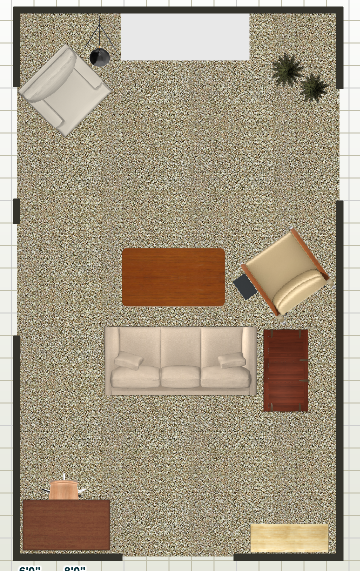
So, when it came time to convince dad this was a good idea, it really didn't take too much convincing. Plus, when I skootched all the furniture to where it would end up- as a mock up of what the space would look like after we erected a wall- we all ended up loving the cozy feel it created. in about an hour, up went a wall! 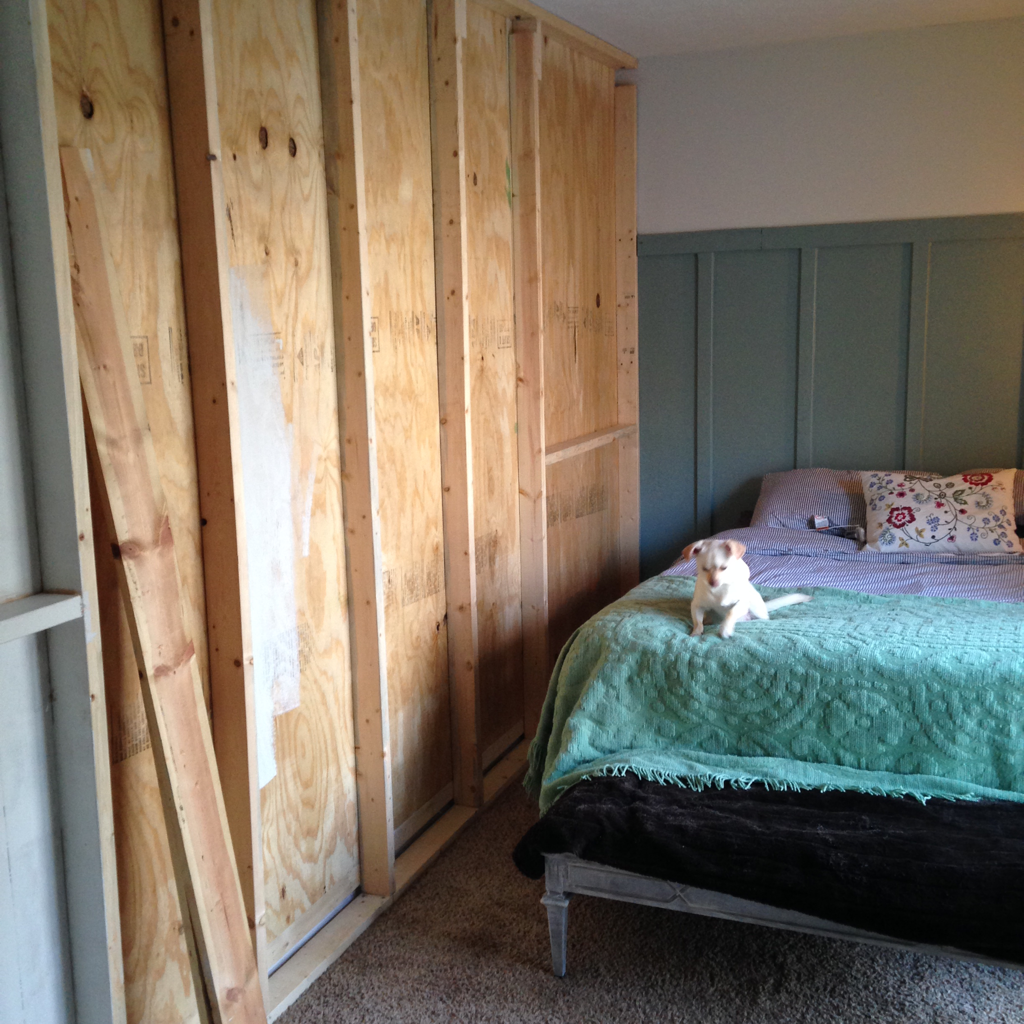 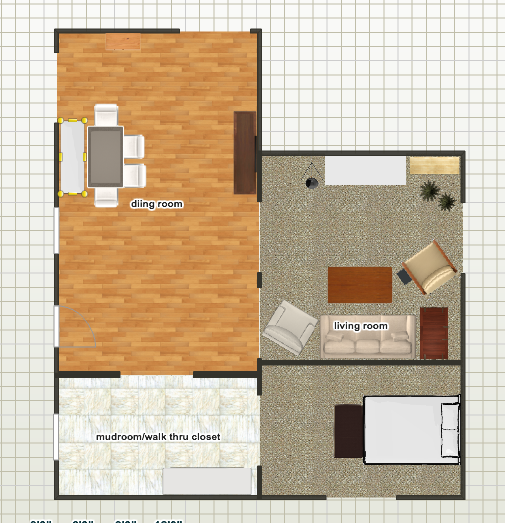 Here's the new layout of our space, including the new entrance to our bedroom. When you walk into our house, you enter into our dining room. If you turn to your right, you can enter into what used to be our mud room. Now, it's a mudroom/walk-thru closet that enters into our bedroom. 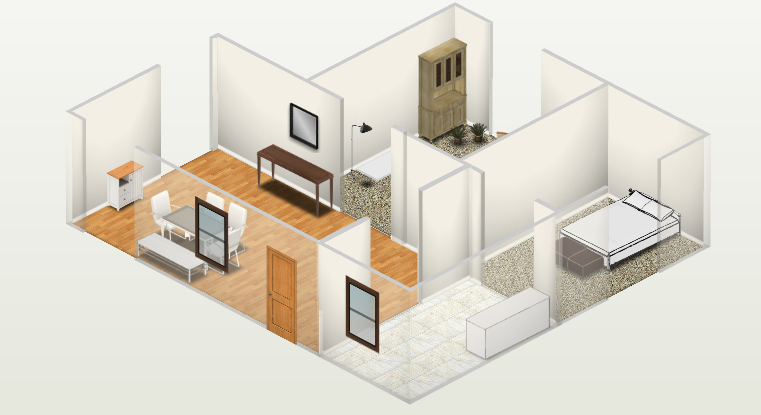 Now, with a wall.... comes the fun!! And I'm totally #GEEKINGOUT over the idea of leaving off the drywall. This also took some convincing. Since this space was going to be pretty small, I wanted to be sure and utilize every inch. Leaving off the drywall gives me a chance to add decorations and character without taking away square foot...inches. Take a look: (Interactive image: click around to see before and after of the space) 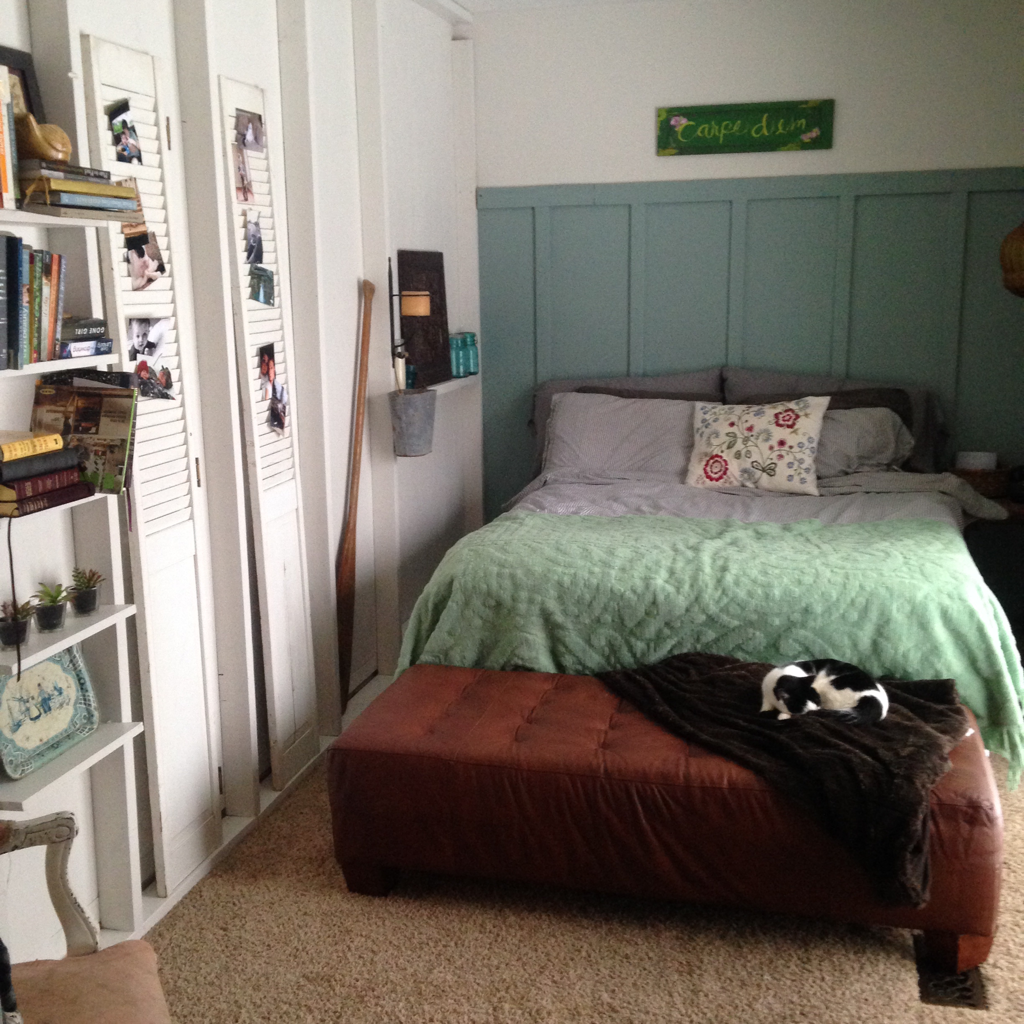 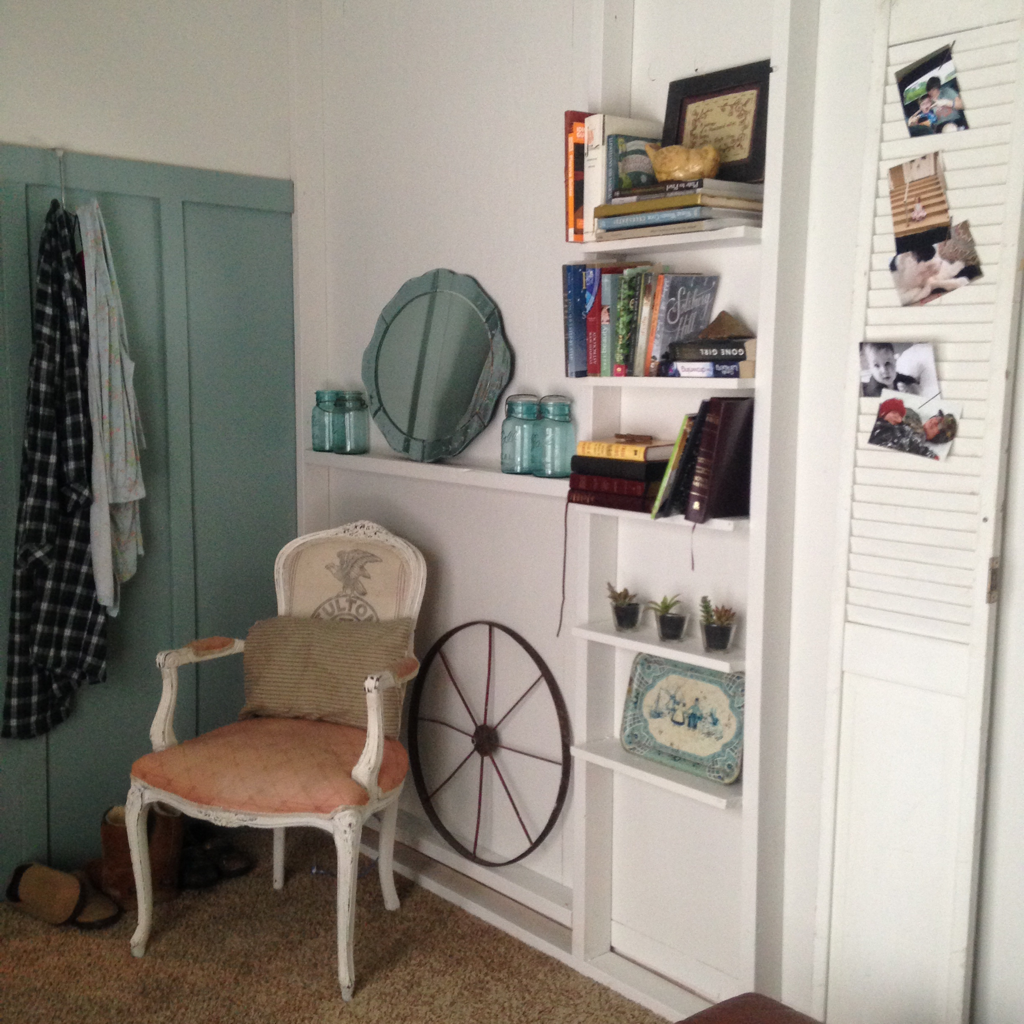 With some scrap 2x4's and 1x6's we quick nailed some vertical pieces of wood between the walls supporting 2x4's to create some ledges and shelving. Also, using some propped salvage shutters, I created a place to hang some of my favorite snap shots. Although our space is small, I am absolutely in love with our new bed room sanctuary! I am totally #GEEKINGOUT over our new space. Total cost for adding a new room: $60 paint- 2 gallons/ living room and bedroom (Color: Moderne White paint + primer from Sherwin Williams) $125 beadboard wall covering (living room side) $56 2x4' (wall) $30 hardware, nails, etc. $0 labor (good ol' fashioned elbow grease) $0 shelving and trim (used scrap from other projects) MUCH cheaper than adding a new room onto the house. Like what you see? Stick around and come back often for more! I love a good before/after home makeover, so there will be plenty! see ya next Tuesday for more GEEKING out. Share your geek out stories on Facebook or Instagram. 
2 Comments
|
Enter e-mail address below to get notified of new blog posts via e-mail!

About Me:Shoestring Amy is a free-spirited momma. With a family of five comes an active lifestyle full of energy. Amy strives for a lifetime of fun, laughter, and memories. Rather than smothering in debt, working for "things," and walking the same ol' line of misery created by a dead end job, she creates much larger goals. CONTINUE READING.... 


Categories
All

Posts from the past:
January 2017
|
 RSS Feed
