|
Mr. & Mrs. seems to be all the rage these days (I crack my self when I say things like that. Sometimes I shock myself at how "mom" I am.... "all the rage these days." who still say that?) Wedding gifts, towels, pillow cases, and artwork; I've seen Mr. & Mrs. printed on just about everything! Now, You know I love a good deal. And when something becomes a trend, there's usually no deal to be found. Plus, I like to mix my designs up a bit and go for something a little less traditional. We're country folk out here in Kentucky (said with my very best southern accent.) So, you know we're hunters.... well, my husband is anyway.What better way to represent us than as a buck and a doe. Awe...isn't that just adorable. 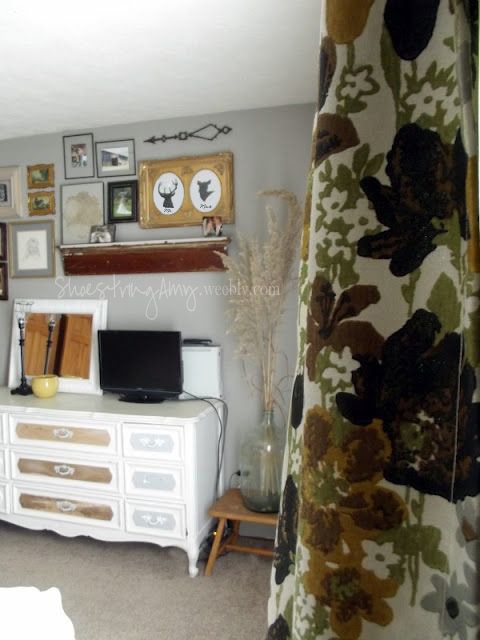 Budget DIY decor isn't my favorite because it's cheap, but because it's so duh-easy. Yeah, duh-easy. I said it. My favorite art pieces tend to be ones that require very little thought. DIY Mr. & Mrs. silhouette artwork 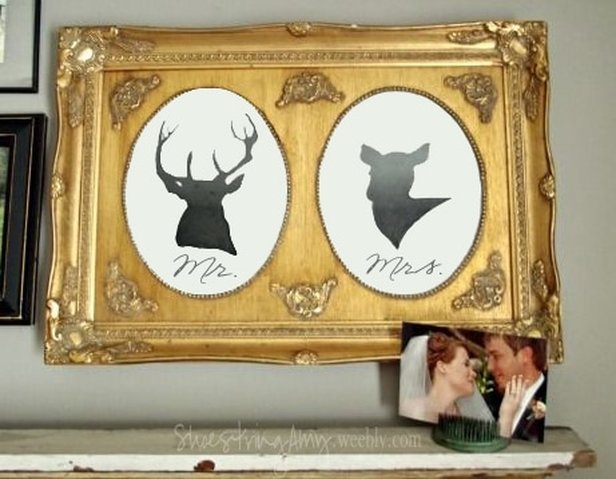 Daw. Look at me and the hubby. Aren't we so cute. Crazy to believe our wedding day was 8 years ago! Need:
Process:
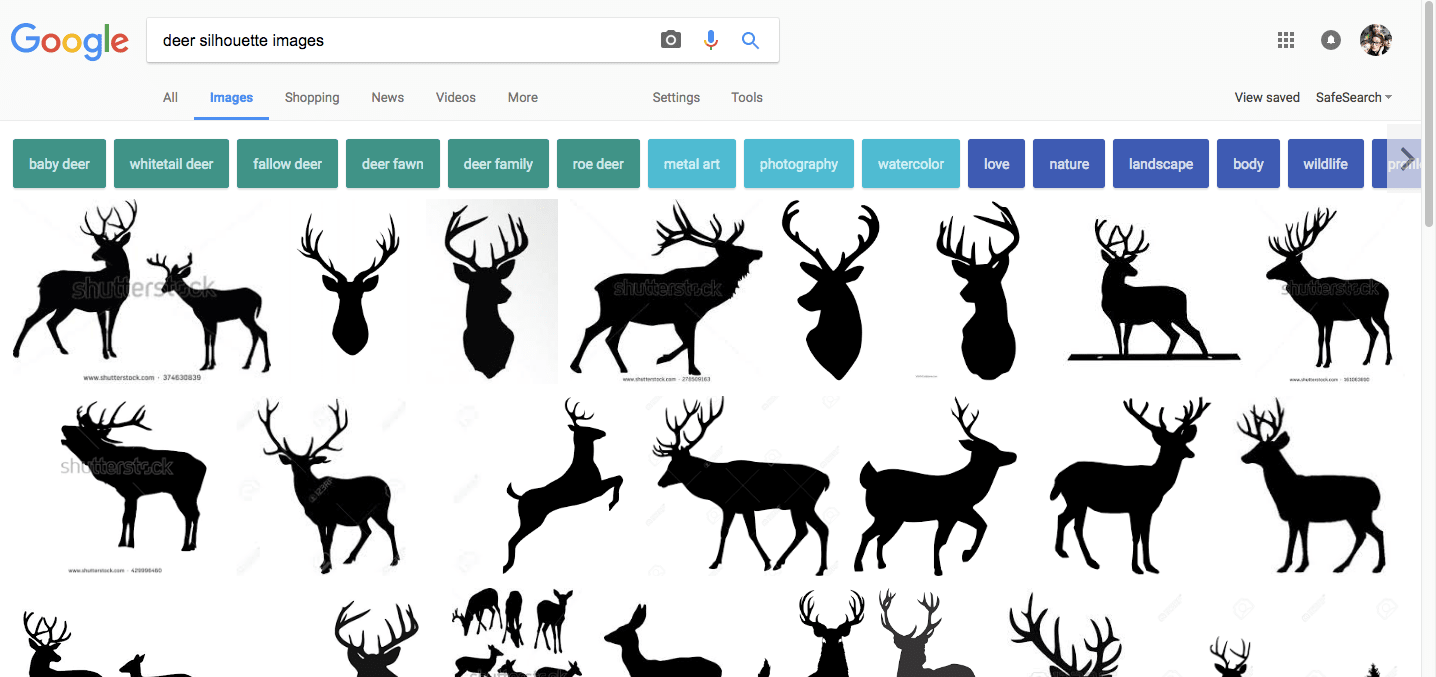  2. Find your favorite images and fonts; Print. (Be sure to customize the size on print preview to make sure it will fit on a standard sized sheet of paper.) 3. Cut images and fonts out and arrange them on a seperate sheet of printer paper; tape in place. (This will be your worksheet.) 4. Lay your final sheet of paper over top your worksheet; use sharpe to trace sillhouette and font. 5. Frame your maserpiece. 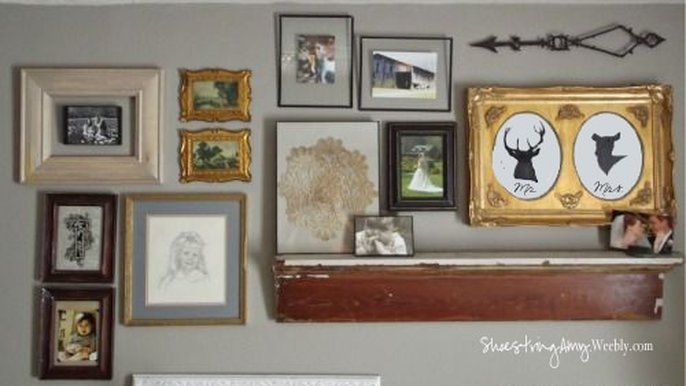 ____________________________________________________________________________________ 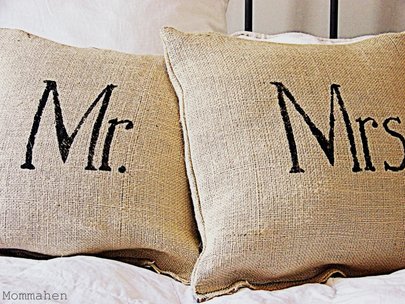 Bonus DIY: Use a paint pen, sharpie, or fabric paint to simply add text to your pillows! ____________________________________________________________________________________ I mean, seriously, duh-easy right? It can't get any easier than that! And it's so cute. You could play around with some different frames, paint/marker colors, and good quality papers. Easy-peasy-lemon-squeezy. What do you think? Peace, Love, and art! 
3 Comments
 According to Realor.com, This is a trend that needs to die.
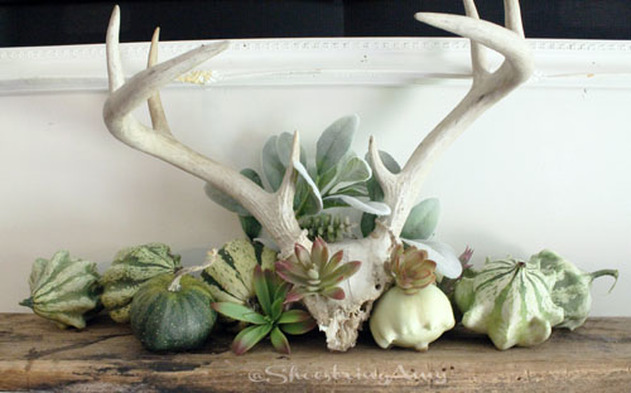
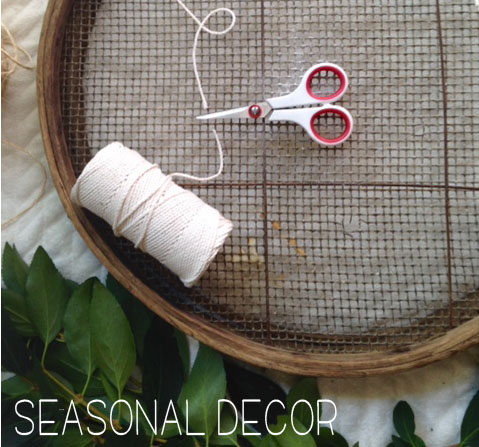
I come from a long line of two families that couldn't be more polar opposite. One side of the family would just, absolutely, be appalled at the thought of displaying a deer head. The other side of my family have walls covered in carcasses from hunts of an entire lifetime displayed proudly on their walls. And then there's me. Somewhere in the middle. My husband is an avid hunter. There was a time when I thought this was disgusting and wouldn't dare eat venison, let alone display their horns. Until there was a day I didn't really have a choice. I thank God often for hard times. And for being able to find our way out of those hard times. Because there was a time when we weren't able to fill the fridge, I let my guard down and allow my husband to "bring home the bacon." and actually appreciate it! We have so much appreciation for the animals that walk this Earth and even more respect for them as they fill our bellies. This is something I would have never understood unless it personally related to us. So, long story short: We don't display deer heads out of disrespect or as a trophy of something we killed; We display them to remember how blessed we are. These little gourds were grown in our little garden. If were being honest, they are the only things that really survived. We need a little practice in that department. Fall in love with Fall again because you don't have to go out to the floral store and purchase all your wreath making material. Save your gas, slip on your shoes and explore! 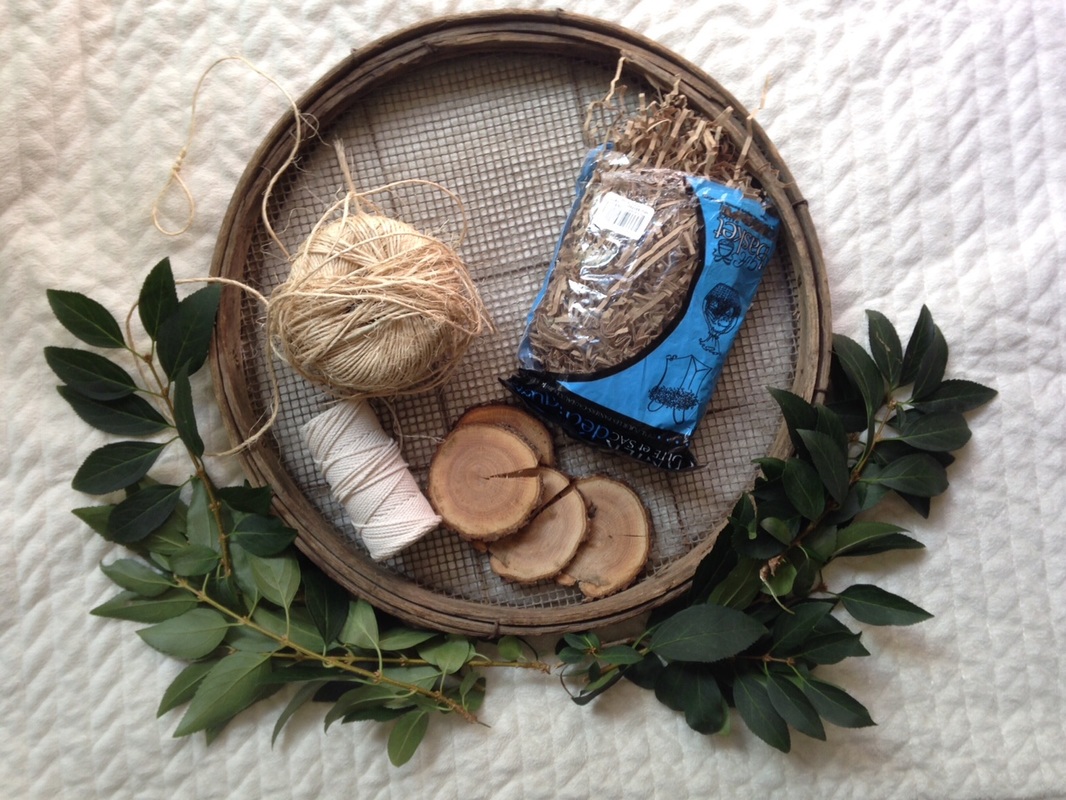 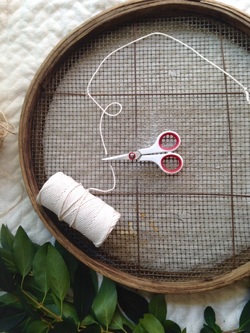 How to make a Fall wreath on the cheap:
Supplies: something round (In this case I used an antique sifter. Other ideas? knitting circle, basket, interesting plate...anything round!) Leaves from around the yard (please don't pick up anything poison. that's just a really bad idea.) yarn or wire hot glue gun decorative Fall items (pumpkins, gourds, apples, flowers, etc.) 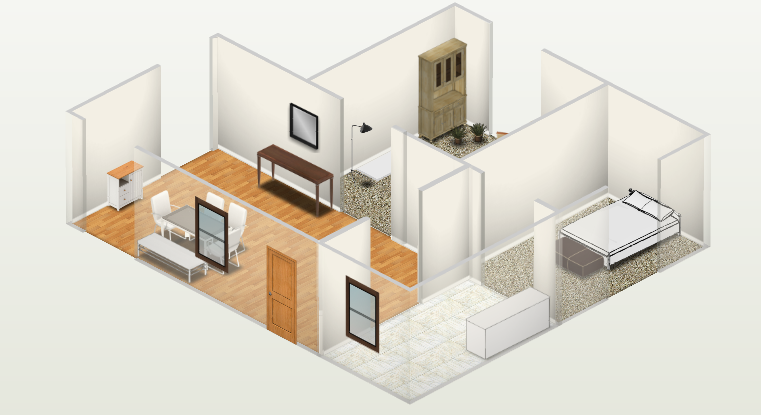 Welcome to #GEEKOUT Tuesday where I share what I'm totally geeking out over at the moment. Today, it's our new bedroom!
Kid's come first: always. So, when my pre-teen started to express his need of wanting a new "kid-free" zone away from his little brother and sister-at first, reluctant- eventually I concurred. While, my giant-growing-too-fast-for-this-momma loves his baby brother and sister, he still craved a space of his own where he could live out all of his Youtube gamer stardom dreams and have his own personality expressed in a space of his own. With a three bed room house and three kids, that leave momma and daddy with out a space of their own. Sorry, little man. No room for you. Then, one night we decided to have a family camp out in our living room. We drug all of our mattresses, pillows, and blankets out into our living room. We spent the night watching movies, eating popcorn, running amuck and having a crazy fun time. It was during this madness that I realized how much room our living room actually had. Our queen sized mattress fit perfectly while still leaving ample amount of room for everything else. Tada! Solution: solved. I created a layout so you are able to see our living room as it was BEFORE: |
Enter e-mail address below to get notified of new blog posts via e-mail!

About Me:Shoestring Amy is a free-spirited momma. With a family of five comes an active lifestyle full of energy. Amy strives for a lifetime of fun, laughter, and memories. Rather than smothering in debt, working for "things," and walking the same ol' line of misery created by a dead end job, she creates much larger goals. CONTINUE READING.... 


Categories
All

Posts from the past:
January 2017
|
 RSS Feed
